21 September 2013

11 September 2013
Pop-Up Swallowtail Butterfly Card - by Jennifer Blomquist
A Fun Pop-Up Card with Swallowtail Tutorial
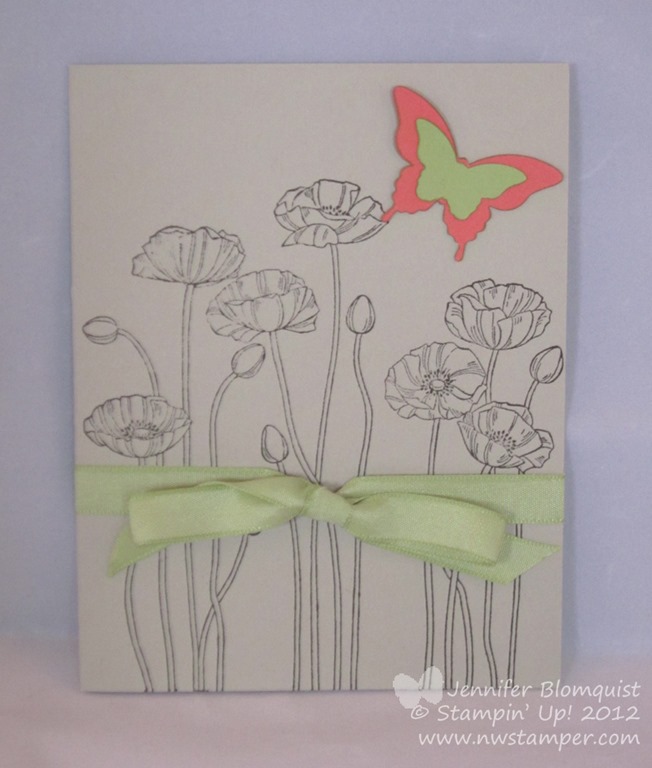
One of the cards that really struck me was a cool card that used the Swallowtail butterfly to create a surprise pop-up on the inside of the card. I thought it was extra cool because when you look at that stamp image, it is too big to fit well on a card front and so I never would have thought it would have thought to try it on the inside of a card.Here is the front of the card… I kept it simple since we were going to be focusing on the details inside the card.
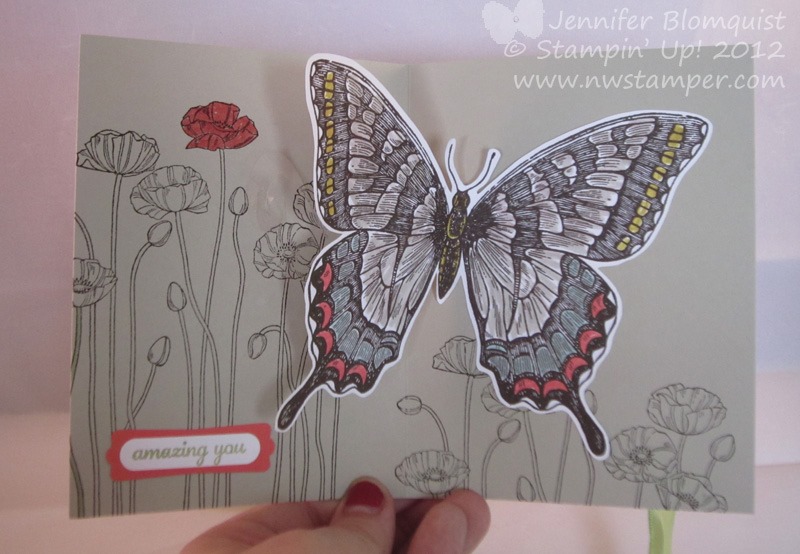
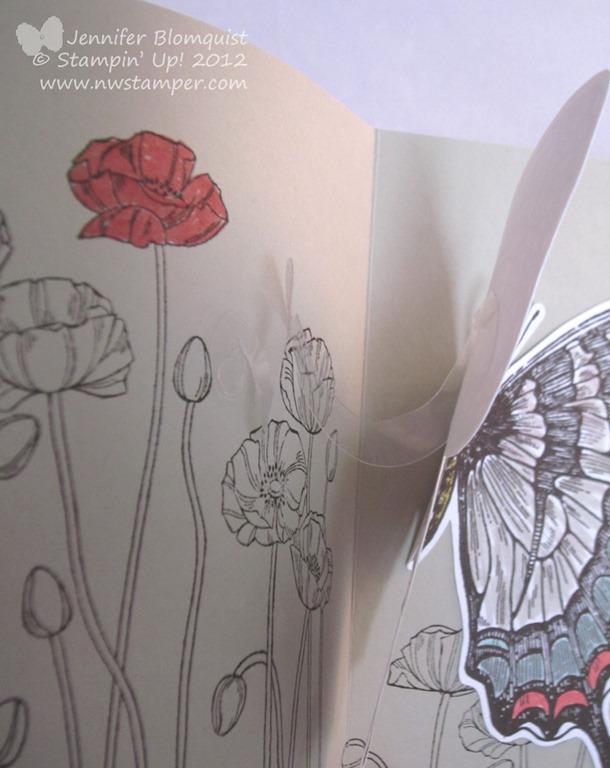
Then you untie the ribbon (which you need so the card doesn’t try to push open on you when you aren’t ready), open it up and hello, butterfly!
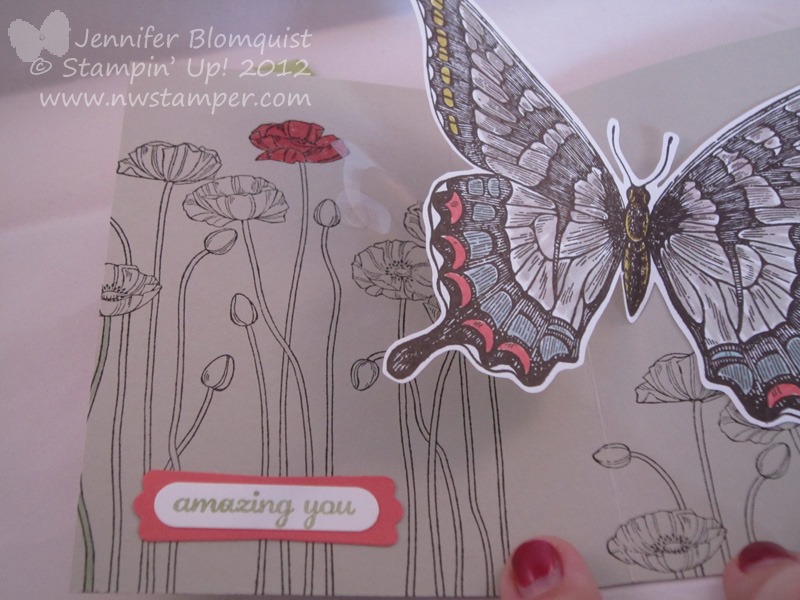
If that is a little hard to see, here is another angle to help you see the pop-up effect. I also used the Pleasant Poppies background stamp to give the effect of the butterfly flitting through the flowers.
To create this pop-up effect, you want to do the following:
- Start by stamping and coloring your Swallowtail butterfly image.
- Then cut out the butterfly.
- Gently fold the butterfly image in half (you don’t have to press hard to crease it, just make sure it is set to fold how you want when the card is closed.
Take a piece of window sheet and punch a 1-1/4” circle out.
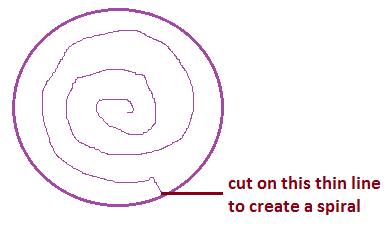
- Cut a spiral into the 1-1/4” circle as shown in my poorly drawn image to the right.
- On the “top” side of your spiral, attach a glue dot to the center of your spiral. Attach another glue dot to the “bottom” side of your spiral at the outside end of the spiral. (it doesn’t really matter which side is top and bottom, as long as your glue dots are on the opposite sides of the spiral)
- Glue the right wing of the butterfly to the right side of your card inside.
- Fold the butterfly in half and press the window sheet spiral onto the backside of the left wing with the glue dot in the center of the spiral sticking to the wing.
- Hold the butterfly down so it is folded in half and close the card. This will allow the left side of the card inside to stick to the glue dot on the edge of the spiral.
- Open the card and check if you like how much of a pop you get with your butterfly. Reposition the spiral as needed to get it just how you like.
Hopefully that made sense! If not, let me know and I’ll try to put together a video on how to do the pop-up effect.
Jennifer's Blog
08 September 2013
Label Framelets Purse
Labels Framelit Clutch Purse
This 3D clutch purse is made out of the Labels Framelits (CASE’d the idea from another demonstrator, Jeannine Tarrio). I added my own personal touch by changing out the closure at the top with the Silver Glimmer Paper punched out with the 1/2″ Circle Punch and add some framelit embossing around the edges of the purse! Super easy to do and fun! All you need to do is flip the Framelit over (blade side away from the paper) and run it through the Big Shot Die Cutting Machine.

The KREATION featured products:
Stamp Sets: Mixed Bunch (Wood Mount 125535, Clear Mount 125537)
Paper: Silver Glimmer Paper (124005), Raspberry Ripple (126842), Basic Black (121045), Whisper White (100730)
Ink: Raspberry Ripple (126859)
Tools: Big Shot Die Cutting Machine (113439), Polka Dots Textured Impressions Embossing Folder (117335), Labels Framelits (125598), Blossom Punch (125603), 2-1/2″ Circle Punch (120906), 1/2” Circle Punch (119869), Simply Scored Scoring Tool (122334), Paper Snips (103579), Tabletop Paper Cutter (106959), Sticky Strip (104294)
Mixed Bunch Stamp Set
Wood Mount 125535- $27.95; Clear Mount 125537- $21.95

Labels Collection Framelits
125598 – $26.95


Thinking of You Cards and Gift Card Holder Using Labels Framelit
The leaves are stamped in 3 different colors – Pumpkin Pie, Crushed Curry and Cajun Craze using a combination of regular stamping and then stamping off (to get a lighter color). I started with the lightest color and finishing with the darkest.

After I stamped the images, I used the Blender Pen to pull the colors together on the leaves to give a softer look.

The KREATION featured products:
Stamp Sets: Magnificent Maple (Wood Mount 131868), Sweet Essentials (Wood Mount 132085, Clear Mount 126457)
Paper: Crushed Curry (131199), Cajun Craze (119684), Very Vanilla (101650)
Ink: Pumpkin Pie (126945), Crushed Curry (131173), Cajun Craze (126965)
Tools: Simply Scored Scoring Tool (122334), Stampin’ Dimensionals (104430)
I was asked by friend if I could make a gift card holder for a Fall themed Bridal Shower. I immediately thought of the Labels Framelit Clutch Purse I created a while back and knew it would be perfect.

I stamped the Magnificent Maple leaf with Crushed Curry then used a sponge dauber to apply Cajun Crazy to the outer edges of the leaf. Love how it came out! Makes it look more real.

The KREATION featured products:
Stamp Sets: Magnificent Maple (Wood Mount 130300)
Paper: Crushed Curry (131199), Cajun Craze (119684), Early Expresso (119686), Very Vanilla (101650)
Ink: Crushed Curry (131173), Cajun Craze (126965)
Tools: Big Shot Die Cutting Machine (113439), Labels Collection Framelits (125598), 2-1/2″ Circle Punch (120906), Paper Snips (103579), Simply Scored Scoring Tool (122334), Stampin’ Dimensionals (104430), Sponge Daubers (102892)
Use Lattice Die to Make Pop-Up Card
Here is a look at the inside:

You can see that there are panels covering the top and bottom of the card. This is attaching the top and bottom of the lattice die to the card which then holds the pop out in the center…

I had to score this one to get it to fit in the card.
You can kind of see how the lattice works here:

I cut the lattice die in half, and scored it at every intersection… then glued the end pieces behind the panels and left the center to fold out…

Lattice die, that I cut in half…

and scored.

I glued the ends to the panels that hold them to the card (3×2.25)

So, this is what the final inside panel looks like. Then, you glue the ends of the black panels to the card (top and bottom) and you get this…

This is what you stick the pop up on. And, you can use this for ANYTHING. Not just Halloween. What a fun surprise!!
AND, when I was making these, I received my envelope board. So, I had to make matching envelopes. Though these are 3×3 cards, I decided to make envies for 3.5 cards (which is a little big) because I was worried that the thickness of the card would not let the card fit into the envelope.
One last look:


Layer On Layer On Layer Leaf Card - by Susan Carlson
I created several versions of the same style card using different card stock color combinations. For all of the cards I used Crushed Curry and Pumpkin Pie inks. I also added Cajun Craze to a few of them. Once completed, the cards needed something "extra," so I added some Crumb Cake splotches from Gorgeous Grunge. Here they are in no particular order:


I purposefully did not add sentiments to these cards. It's always good to have all-purpose cards around that are ready to be personalized.
Using the "Magnificant Maple" leaf stamp from Stampin' Up
 | |
| Item 131868 $9.95 |
Susan's Blog
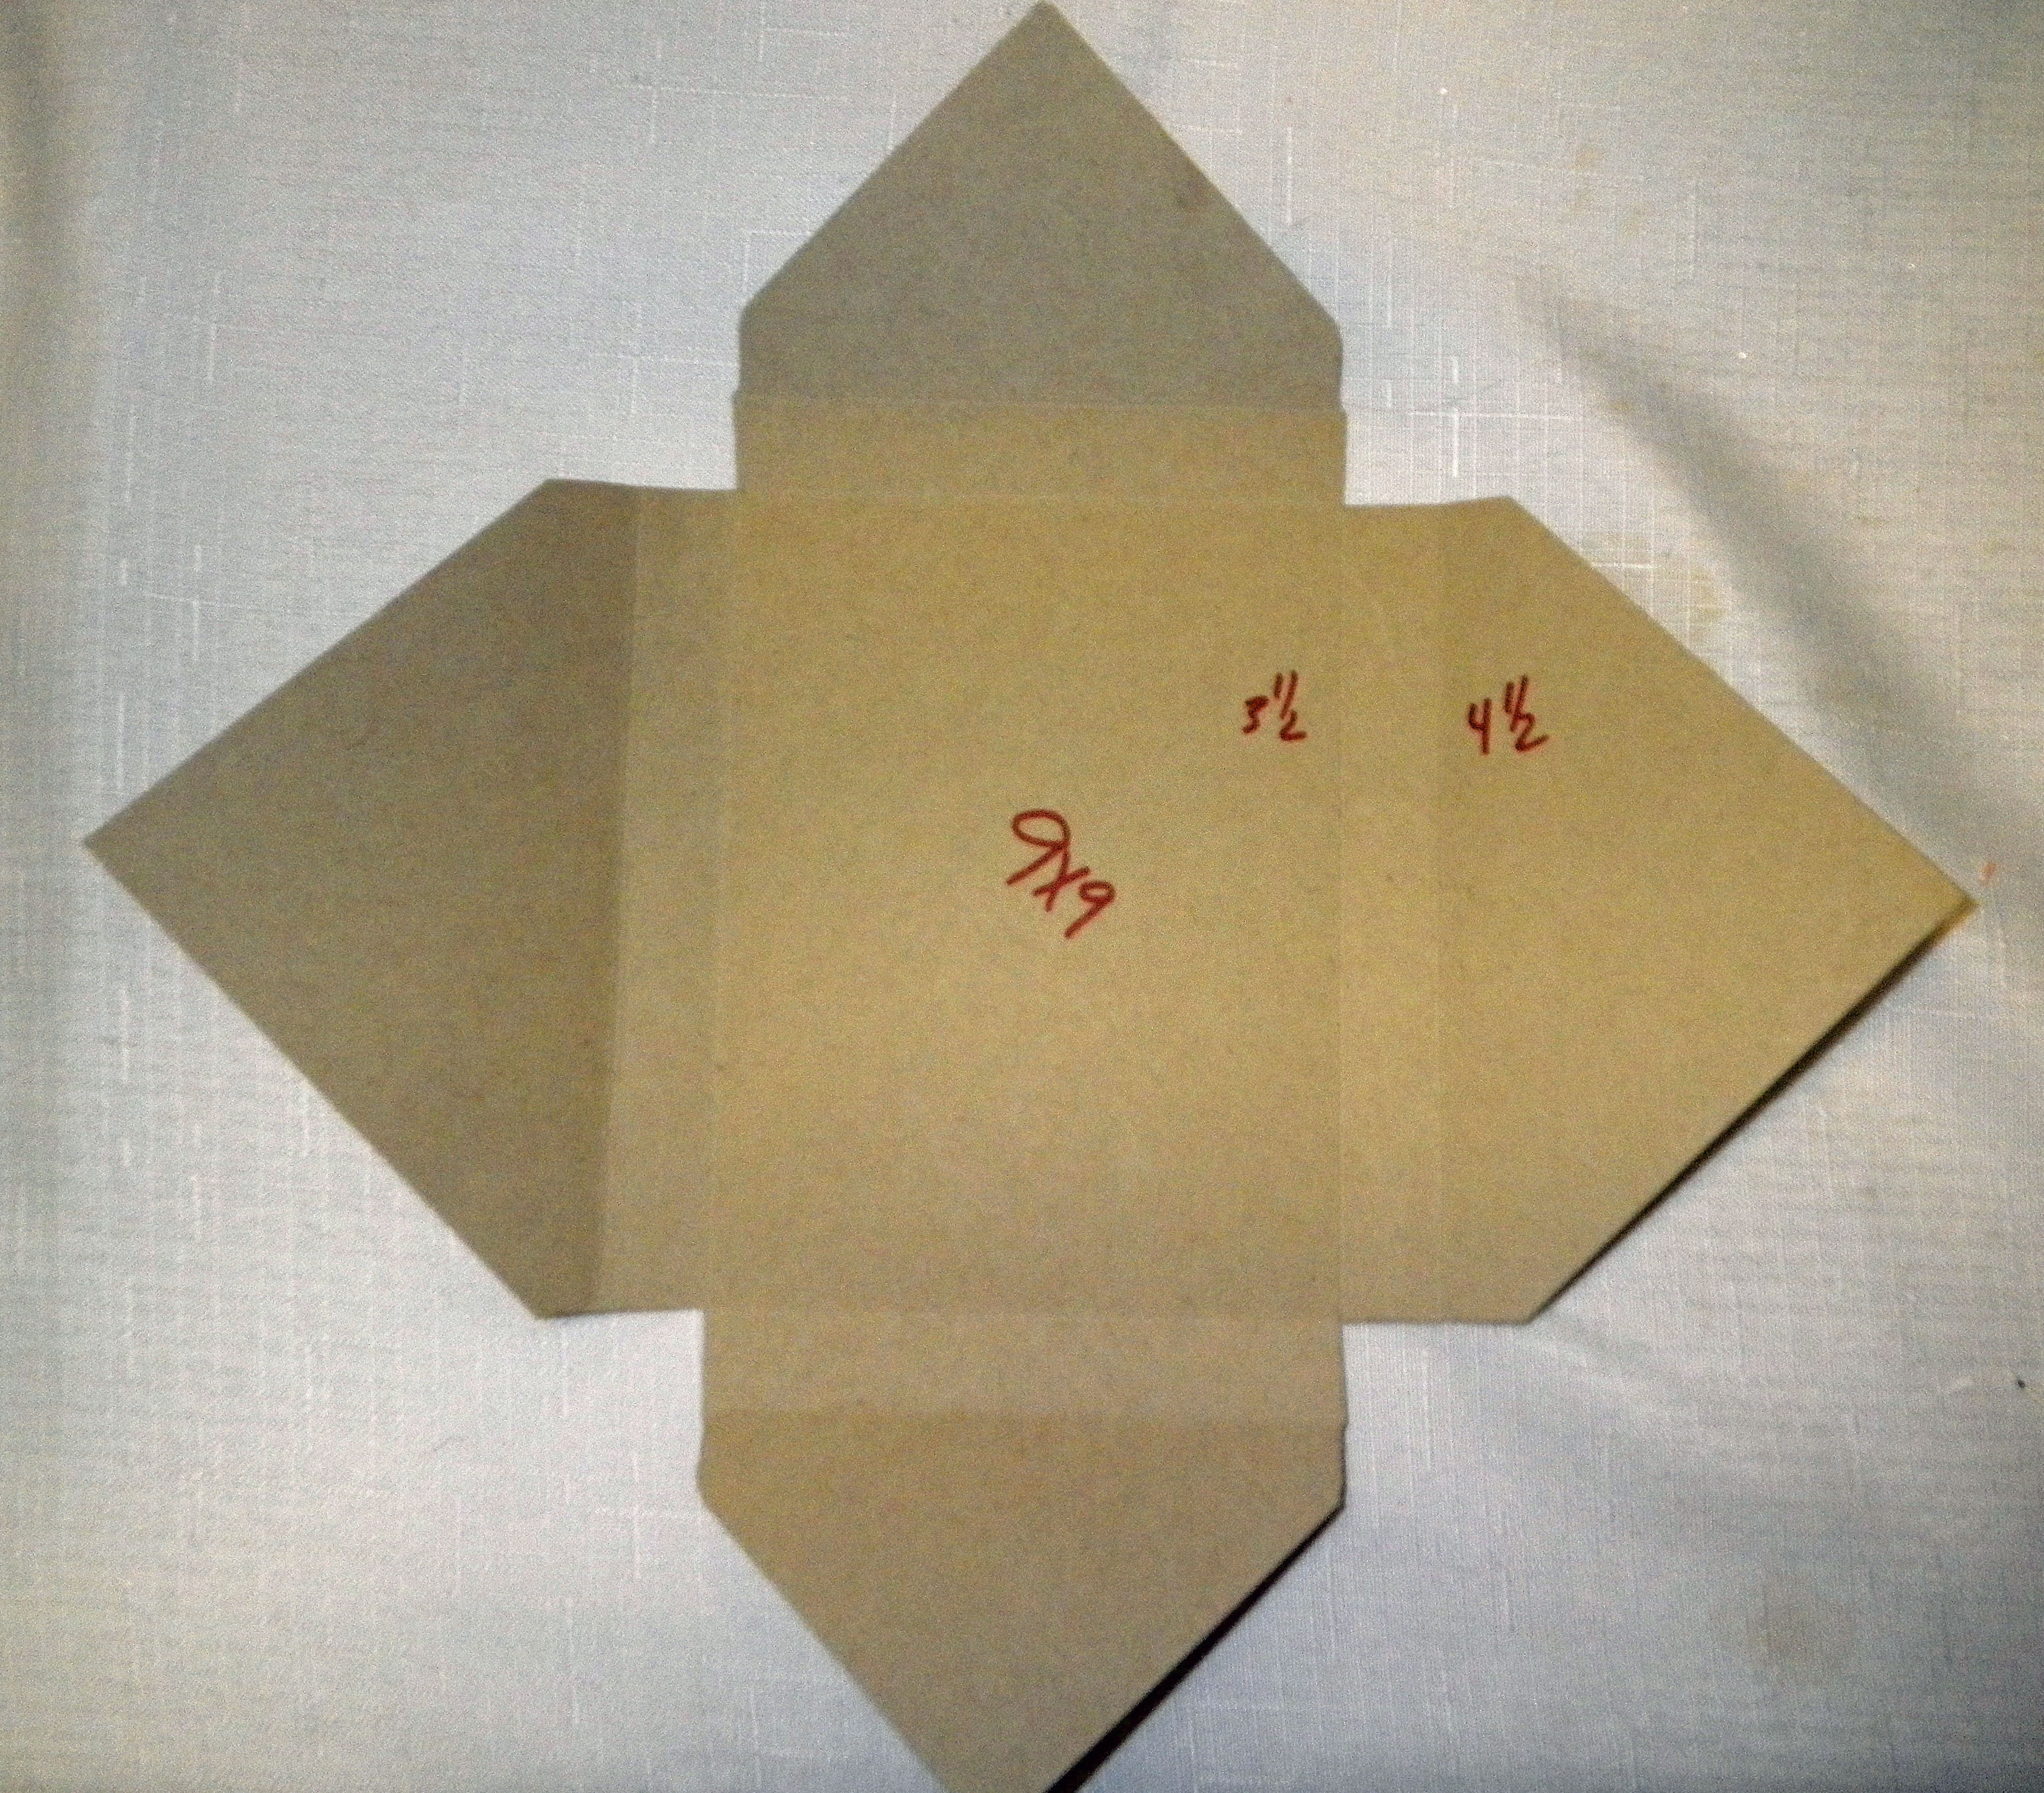
Making A Box Using the Envelope Punch Board
Just a reminder – start with 9×9 piece of cardstock, make your first 2 score marks on the same side at 3.5 and4.5 (all inches)
03 September 2013
A Gift For You Box Card - by Nancy Dawson
A Gift for You


The Label Bracket 132153 punch fits the sentiment from the single stamp (134765). Pool Party CS for the box itself with Winter Frost DSP 132341 accents. I used the Snowflake Bundle 133285 for the decoration accented with a Frosted Finishes Embellishment 132150.
Subscribe to:
Posts (Atom)